Shipments Overview List
Table of Contents
The Shipments Overview List offers a comprehensive snapshot of all your active shipments, enabling better management and decision-making. Let's delve into various customization and automation options that enhance the data presentation and functionality of your Shipments List, ensuring a tailored and efficient logistics experience.
Customizing your Shipment Overview List
You can choose to have your shipments map in view, or to hide it. To hide the map, press on the Eye icon on the right side of your screen.
View with map expanded:

View with map collapsed:

You can now collapse the shipments view panel for a cleaner view, by pressing on the left facing arrow on the scroll bar to your shipments view panel:

Choose how you view your shipment data
You now have access to multiple layout options for displaying your shipment data.
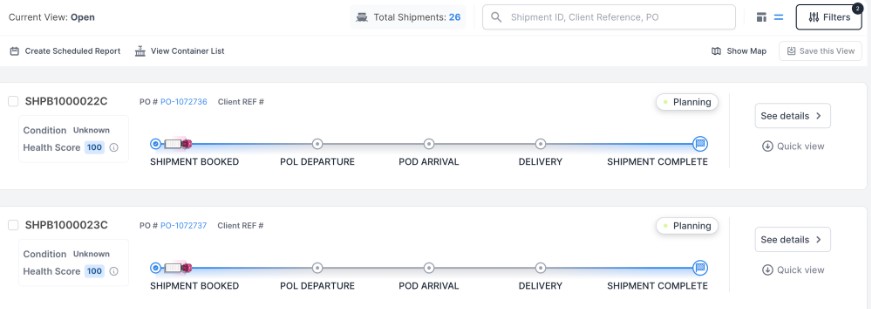
The Standard List View serves as the default option (the first icon to the left, adjacent to the filters button) and provides a streamlined presentation of your shipment information.

The Hybrid Card View, which is the second layout option located next to the filters button, offers an alternative display style for your shipment data. This view features a visual timeline of your shipment, providing an informative and engaging representation of your shipment's progress.

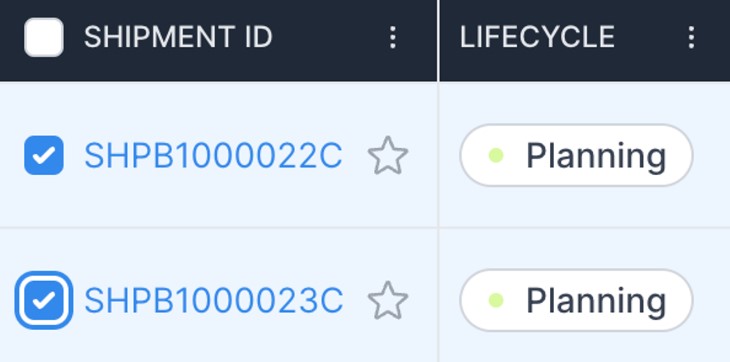
Your most frequently taken actions within your shipment list are easily accessible: First, select the check box next to the individual shipment you would like to action on.

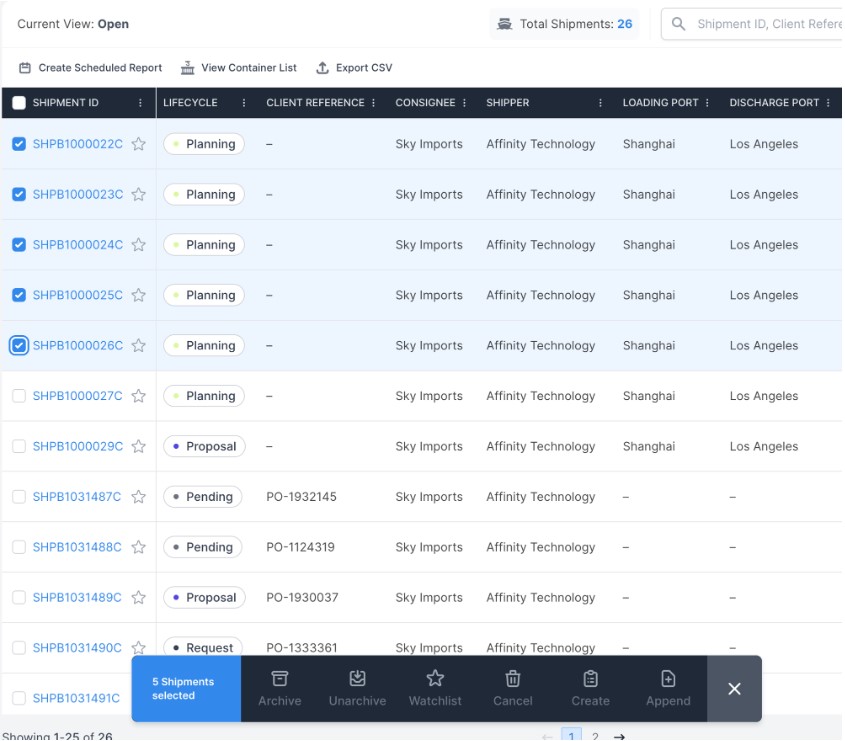
Next, a shipment list actions bulk module will appear. You can now create a shipment queue, hop over to your container list, and also export your current view to CSV in fewer clicks!

Customizing your Filters & Columns
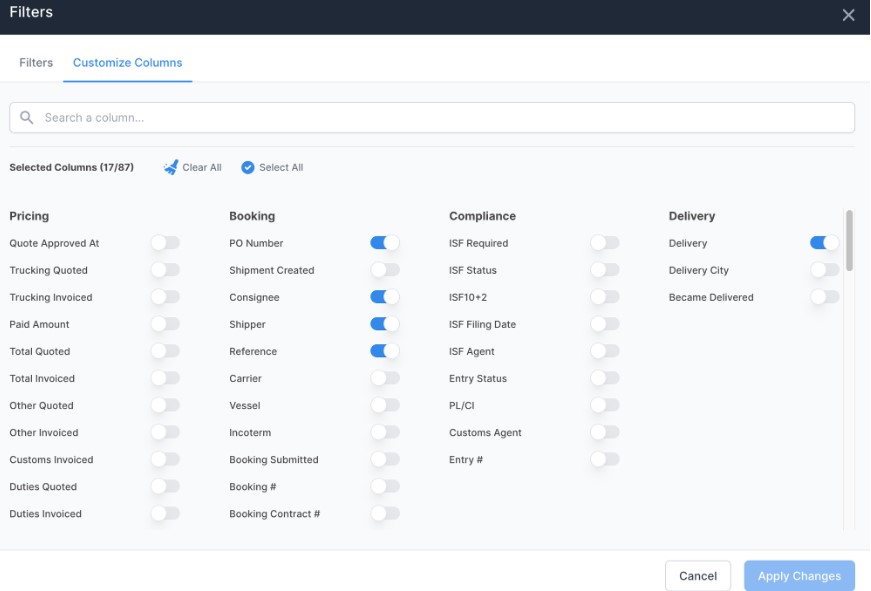
Selecting data points from the “Customize Columns” section will determine if they appear as a column on your shipments list. Pressing this will reveal over 85 data point options that you have at your finger tips!

You can easily toggle any particular data point on & off, and “Apply Changes” to see your refined shipment view.
Note: The selected data points will automatically re-set when you exit the shipments page. To learn more about how to save a selection of data points- check out our guide on creating customs views!
You can easily create a scheduled report, hop to your container list, or export your current view to a CSV file with the options located front and center on your shipment list.

To reveal the bulk actions you have available, select the check box next to an individual shipment. You can select as many as you’d like! A menu bar will appear at the bottom of your screen, giving you bulk options you can take!

Selecting Shipments For your watch list
You can select shipments to be on your watch list right from your shipments page, simply press the star next to your shipment ID number and it will be added to your watch list! You can also do this through your bulk menu options.

If you’d like to start over with a clean slate, feel free to use the “Reset” View option!

Managing your Lifecycle Views
Within your shipments and containers tab, you have the ability to Manage your Lifecycle views. This allows you to select certain lifecycle views to hide from your views column.
To manage your lifecycle views, navigate to your views panel on the left side of your Containers or Shipments screen.

Next, press on the Manage button.

From here, you're able to select specific lifecycles to toggle on or off.

Once you've made your selections, press Apply Changes.

Your lifecycle views panel will now be updated to reflect your selections. The platform will save your selections for the next time you navigate to your Shipments or Containers page.